New Life For Old Threads: Medieval to Modern in Velvet


I don’t think Andrew was a fan of this fabric. My first clue was when he saw the before dress and said, “No one wears velvet anymore.” I told him he was a dude and he doesn’t know anything! That pretty much won the argument. But I see velvet making a comeback. I love it! I think it is beautiful and luxurious when done in the right silhouette. The above silhouette is not the one I’m talking about.

 
This is more what I am talking about.


I’m finding, as I work with more fabric, how different each one is. This fabric had a pretty good amount of stretch, but even with the stretch it had, it was hard to judge what the fit would be like without putting a zipper in.

I Make My First Pattern


So, I finally did it. I made, from scratch, my own sewing pattern…with a little guidance of course. I have wanted to make a skirt with darts and a zipper for a while, so I went where any person goes for guidance, Google. I came up with “Melly Sews” photo tutorial on drafting and making a skirt with darts…Gosh, that Google, she just gets me!  It was a pretty good start to learning how to make a pattern. A couple tips if you follow this tutorial:


  1. She has you find exact measurements for the skirt darts and fitting by drafting on muslin or scrap fabric, however, in the instructions she has you add .5” to each measurement you take, along with 1” for seam allowance. I found this to be way too much and only made the whole fitting process extra slopping and difficult. If I had to do this process over I would take out the .5” to the measurements, and stick with the 1” seam allowance, for the first drafting. However, you may find this extra  seam allowance necessary.
  2. Her instructions call for front darts, however I did not need front darts (this is probably why I did not need the extra seam allowance). Simply put, expect to redraft this pattern a few times before getting it right. With that said…
  3. My advice would be, go buy a sheet from the thrift store, and do each draft on the sheet until you get it exact, then use the perfect, finished sheet-skirt as your stencil for your final pattern.

My finished product:
 

Making leggings and Clutches


  I made two things, or attempted to make two things with the fabric I thrifted last week. They were both failures and successes in ways.

The first:

 
I cut an old pair of leggings to make a pattern for these, and they were super easy to make… unfortunately I overestimated the stretch of the fabric and they ended up the size for about a 7-year-old… fail. Fortunately, I have two 7-year-old nieces, so whichever one fits into them can have them… not a complete fail…

And the second:
 
 I pinned this Bow Clutch tutorial awhile ago and have wanted to try it. I finally did, and it kind of worked out. Two tips though: 1.When it says to use interfacing, use it, it turned out a bit flimsy 2. The tutorial picture is deceiving on the size. I cut down the dimensions a bit because it was a little large and I made it a wristlet instead with a 7 inch zipper instead of 9. 

Thrifty Outfit Tuesday: Fabric Haul at Savers

I recently began to pursue learning more about making my own clothes. That is, to learn more about how to make patterns and how clothes are put together from the beginning, in the hopes that I will be able to do it on my own eventually. I’ve started by purchasing some sewing patterns, which I have done before, but it has been many years since then, and they were usually just pajama pants, or simple skirts. I found some really cheap, cute patterns on ebay (dresses and pants, not just pajama pants, because as much as I’d like to where pjs all the time, it’s frowned upon)

http://www.ebay.com/itm/New-Look-6918-Misses-skirts-pants-UC-FF-Pattern-sz4-16-/131040699959?pt=LH_DefaultDomain_0&hash=item1e82a26637 
 
One thing you’ll always need to accompany a pattern is fabric, so I went to Joanne fabrics hoping to find some cheap red tag material…I was dumbfounded at how expensive fabric is. I found some red tag fabric that had a $12.99 tag on it and I was certain that meant for the whole spool…nope that was per yard.
 
I know for me, making my own clothes is supposed to be a cheaper alternative…what is the point of putting in the time to make my own clothing if it costs me $24.00 for 2 yards of fabric. I know now for certain that Forever21 has small children in those back rooms, working on looms, and cutting and sewing adorable chic clothing, how else could they get there prices so low….. ok maybe not, but you get my point.
 
 
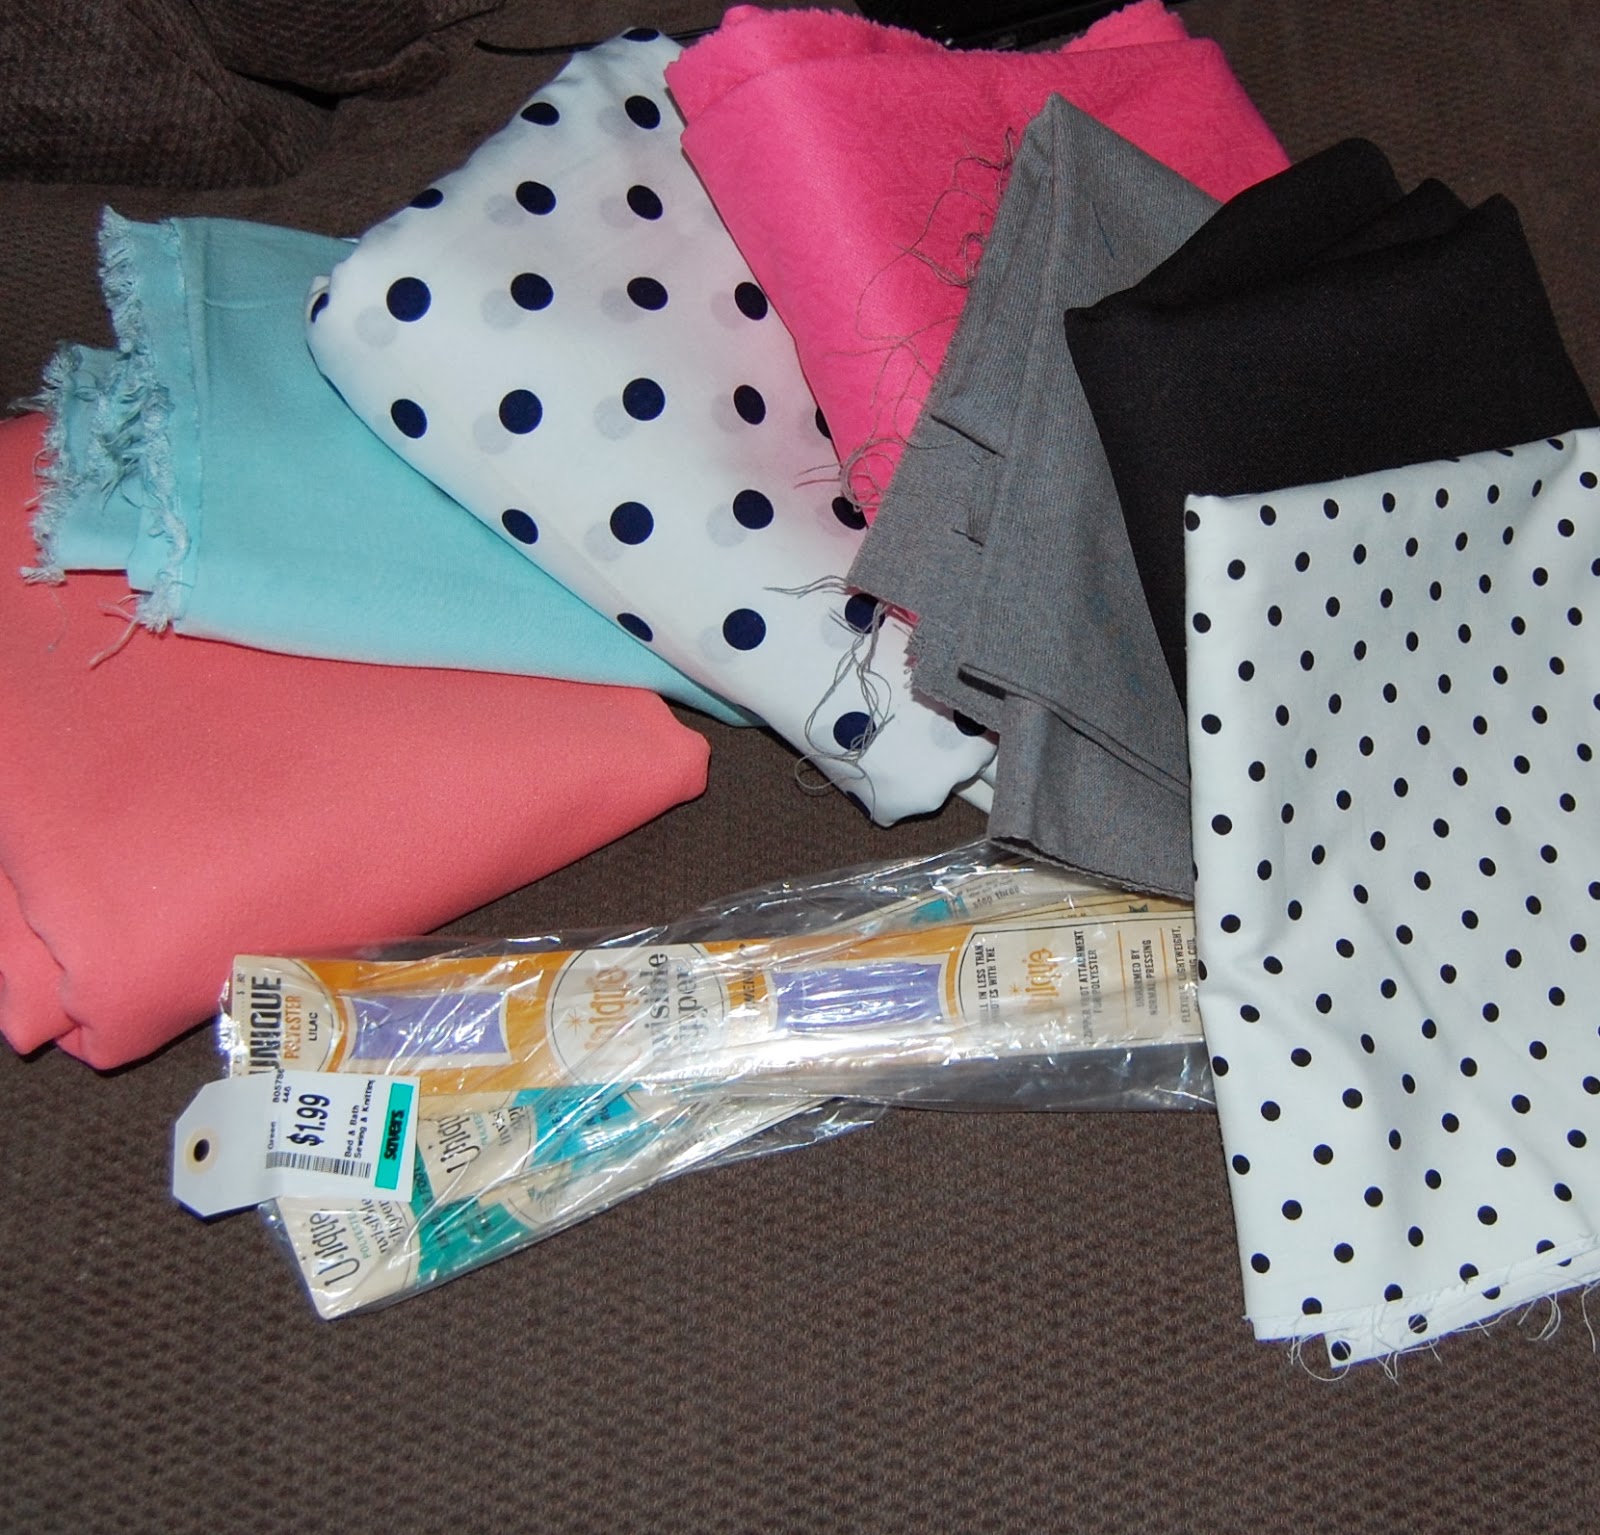
I was appalled, and so like any other thrifting fiend, I headed over to Savers, and it was as if heaven had opened up and showered down beautiful fabric… or perhaps it was just the remnants of a crafter’s good intensions… Either way, it left me with 7 different cuts of material and a bag of 5 zippers, all for $17.00….A miracle in my book.

Moral of this story, THRIFT YOUR FABRIC! The savings is unbelievable and it makes the whole thing worth it. You can thrift great patterns too. It’s a bit of an unconventional Thrifty Outfit Tuesday, but I hope to make something out of that thrifted fabric, so technically, it will be a thrifted outfit one day.

I Learn How To Make An Easy Peplum Skirt


As I was moseying around on YouTube, looking for videos on how to make my own sewing pattern, I fell upon DIYmeesha’s video above, about making a peplum skirt. I watched it, along with a bunch of her other videos and was immediately excited to try a bunch of her tutorials.


I found this fabric at the thrift store for $1.99 and knew it would be perfect for this project.


 While I could have made this skirt on my own, the way I would have gotten to the end result probably would have been much harder. This tutorial made it so easy. It reminded me that learning new things is always good. I’m excited to make more:)
Skirt:$1.99-for fabric
 
Thrifted Heels-$8.00
 
H&M Longsleeve-$4.80


How to Thrift Clothing to Upcycle


You may think that little thought goes into the pieces I upcycle, but that is just not the case. A lot rides on picking the best article of clothing in order to make not only an easy, but successful upcycle. For Example:

This is a dress I thrifted specifically for the purpose of upcycling. It had the key elements that make for an easy fix.
Think about following when deciding if something is upcycle worthy:
1. Think about what makes the piece dated?
2. Can the things that make the piece dated be changed easily?
3. Is there something unique or modern about the piece that makes you like it?
4. Does the price justify the fact that this upcycle may fail?(seriously, it happens, and you’ll feel better if you only spent $2 on it.)
5. What type of fabric is it made out of, is that fabric easy to sew, and how does it need to be cared for.(A lot of older clothing is dry clean only, and ain’t noboby got time fer dat)
This dress met all my perquisites. All of the things that made this dress dated could be easily updated, and polka dots are a timeless pattern. The cost was low and easy care.
The first thing that made this dress doughty was the neckline. I took the buttons off and opened the neckline by pinning and sewing open.
The second thing that needed to go was the length of the sleeves. Luckily the hem was quite large so all I have to do was fold them up and sew down. No cutting needed.
The last thing was the length, always the easiest fix. I like to bring dresses right to knee so they are work appropriate.


Thrifted Dress-$5.99
Thrifted Boots- $12.99
Thrifted Belt-$2.00
Flee Market Necklace-$3.00
Sweater- Gift